
Wix Implementation Guide
Let’s integrate Bablic with your Wix site. This guide will help you get started. Here are the things you’ll need before you get started:
- A Bablic account (Don’t have one? Click here!)
- A paid Wix account.
Click here to log in to your Wix dashboard to get started.
Navigate to your dashboard by clicking "Site" and then "My Dashboard".

Next, click on the "Settings" tab and scroll to "Advanced Settings" and select "Custom Code". Please see the screenshot below.

Note: you will need to upgrade from the “Free” tier to add custom code
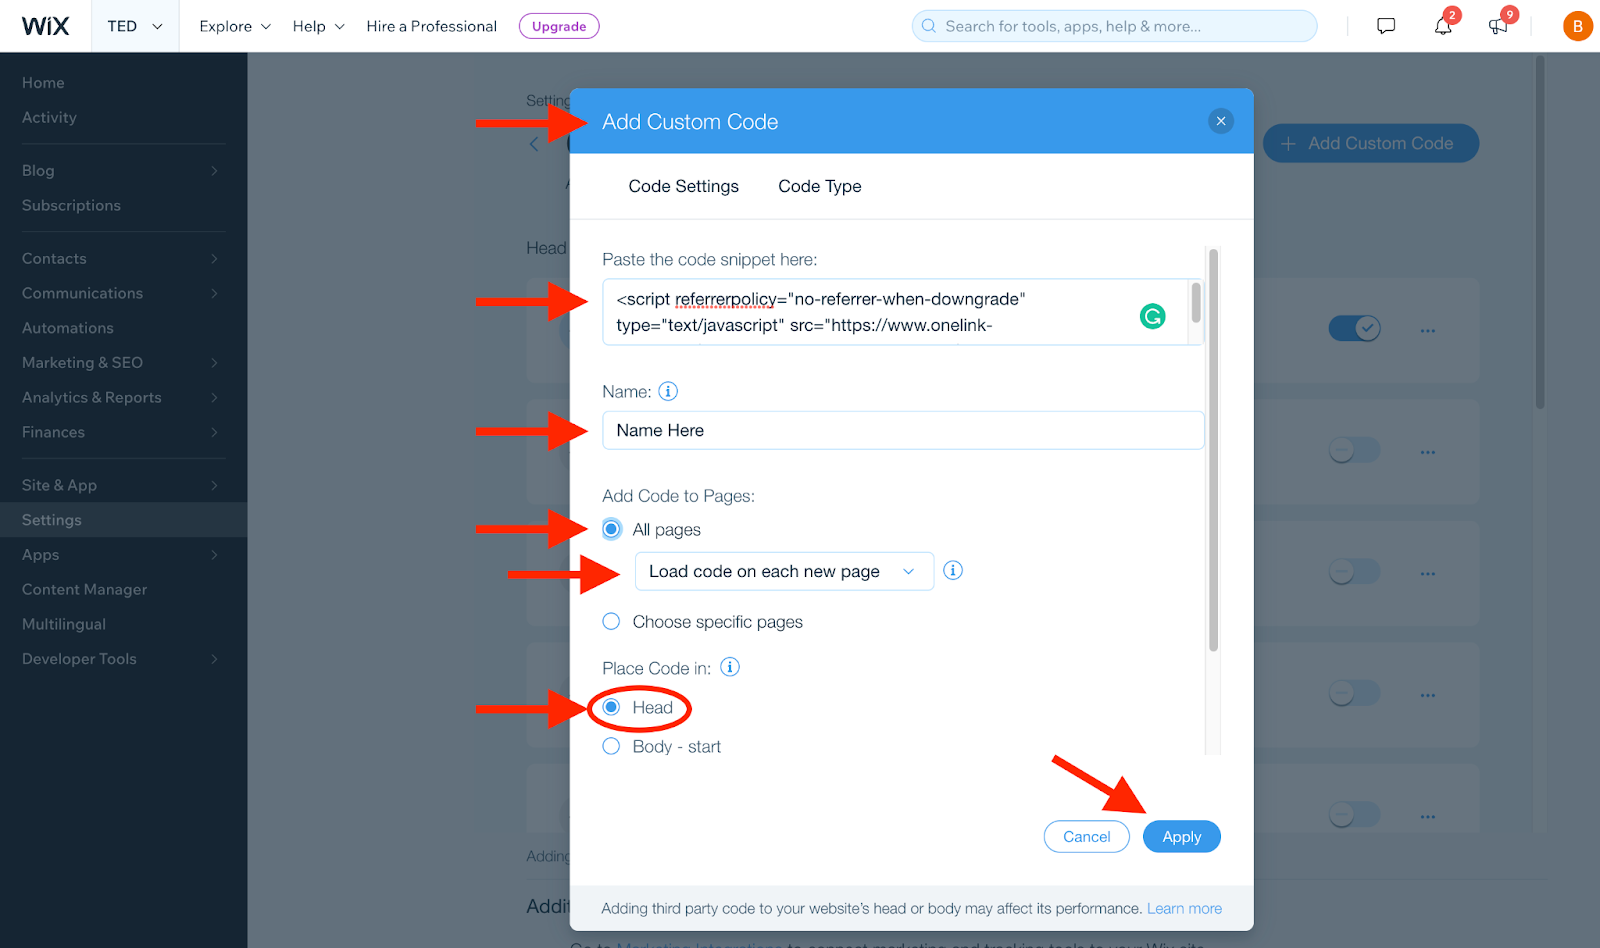
Select "+ Add Custom Code". There are options to add the custom code snippets into the "<head>" or the "<body>" of your site. You MUST add the custom code to your website's "<head>".

Click here to log in to your Bablic project. Under Project in the left-hand menu, go to your Installation page and copy your snippet of JavaScript from the Injection card at the bottom of the page.

And paste it into the "Paste the code snippet here" field. After pasting the code, give a "Name" (e.g. "Bablic"), select "All pages", select to place code in the "Head", and click "Apply".
Ensure that the custom code is in the “Head” and is “Enabled”.
